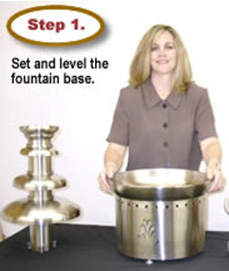
Set the chocolate fountain base on a sturdy, level surface to begin. Starting off with a sturdy level surface will ensure proper operation of the uneven sheeting of chocolate over the fountain tiers is usually the result of the chocolate fountain not standing level or that the chocolate fondue is too thick.
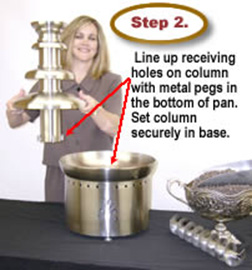
Pick up the main column and tier assembly and line up the 4 receiving tubes at the bottom of the column with the 4 pegs in the bowl portion of the fountain base.
The fit is snug when seating the pegs into the receiving tubes at the bottom of the tier column. Once you have lined them up, slowly work the column down until it is securely attached to the base.
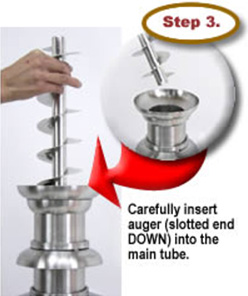
After the base and tiers are attached you can insert the. Be sure the auger is inserted into the main column with the slot in the center of the auger bar pointed down. After inserting the auger into the full length of the column, give a slight turn to the auger until you feel the slot at the auger bottom lock into the auger drive key in the center of the bowl base.
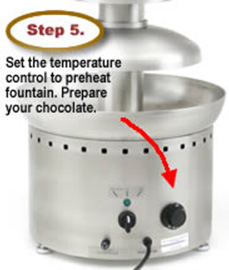
With the fountain fully assembled and level, it’s time to get warmed up. Set the temperature control for 250° while you prepare to melt your chocolate. Chocolate chips or callets can be added directly to the pan in the fountain base and heated until melted. After your chocolate is melted, reduce heat to 175-180°.
For a quick setup, we suggest pre-melting your chocolate in a microwave able zip-lock bag or over the firelplace
![]()

